Tag Archive for: evidence

A homicide case is a puzzle, and it’s the job of the investigator to put the pieces together until they see a picture emerge. They may not always complete an entire image, but there should be enough there to clearly know that a crime was indeed committed and that the face that emerged from the puzzle is definitely that of the suspect.

Here are some of the major points/puzzle pieces to consider when investigating a murder.

1. When conducting a homicide investigation always take time to look at the case from the point of view of the defense attorney. What holes are in the case? What does your case lack? What’s missing? What areas could a defense attorney attack? Find those things and then locate the evidence needed to fill the voids. If there’s evidence out there, find it. If it’s not, then know the reason(s) why it’s unavailable. If details are left open-ended, a good defense attorney will use untidy loose ends as a means to indicate their client’s innocence. “If the detective had simply gone one step further they’d have discovered that my client could not be guilty of the crime!” Besides, the things you discover while approaching the case from this angle will almost always help build a better and stronger case.

2. Direct Evidence and Circumstantial Evidence.

A woman is standing at the counter of a dry cleaning store waiting for the clerk to come from the back room. She’s startled by a loud bang. The door to the room opens and a bald man holding a gun in hand runs out and then continues running outside through the open front door. The woman goes into the back room and sees the female clerk lying on the floor. She’s dead from what appears to be a gunshot wound to the head. There is no other entrance or exit from the room. The customer calls the police.

Direct Evidence is something actually observed by the witness, or clear evidence of fact. In the case above the direct evidence is:

a) The sound of the gunshot. The customer actually heard the sound.

b) The customer saw a bald man emerge from the room and he was holding a gun in his hand.

c) The clerk is lying on the floor with what appears to be a gunshot wound to her head. Blood, or what appears to be blood, is on the floor around the head of the victim.
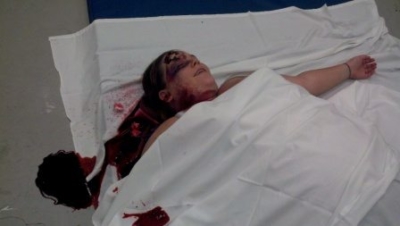
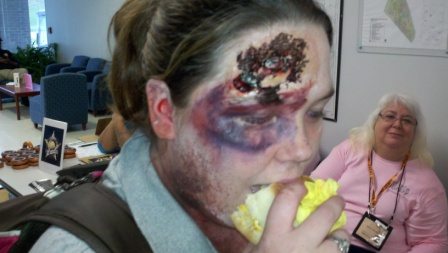
Above image is from the Writers’ Police Academy’s “Treating the Trauma Patient” workshop. It is a staged photo and no one was harmed. The smile on the “victim’s face, however, was very real. She enjoyed teaching writers.

*Officers may not testify that the reddish-brownish liquid substance on the carpet was blood because at the time the material had not been tested and identified by laboratory experts. They may only testify to what they actually know, not what they think.

Circumstantial Evidence relates to fact or a series of facts that infers, but does not implicitly prove, another fact. In the case above we can infer, circumstantially, that the bald man who ran out of the room was indeed the killer because no one else was there, and there was no way anyone could have escaped other than by exiting the front door.

Now let’s revisit the case of the Washed Up Dry Cleaner, but from the defense attorney’s point of view. We, as investigators, know this … The clerk was killed by a gunshot wound to the head. A customer saw a bald man holding a gun run out of the back and then escape out into the street.

The defense attorney is already thinking of angles to defend their client, such as … It’s possible the clerk had tried to kill the bald man who managed to grab the gun, which accidentally discharged during a struggle. Or, the bald man, fearing for his life, fled from the business while still clutching the pistol. Suppose the bald man had witnessed the clerk shoot herself as an attempted suicide, so he panicked, grabbed the gun, and ran to get help? Was there a romantic tie between the two that could’ve resulted in a “heat of the moment” act of violence?

These are puzzle pieces that must be located in order to prove the “maybe this, maybe that” theories wrong, and that the bald man indeed killed the clerk, or not.

3. Proving Fact. 

We have the evidence, both direct and circumstantial, so how to we prove the bald man killed the clerk, or that he did not commit the crime? Let’s start by proving the defense theories wrong. Suicide? We’ll check for close contact powder burns and/or stippling, and gunshot residue on the hands of the victim. None there, so suicide is most likely not an option. The same is true for a struggle over the weapon (the self defense claim). No signs of a struggle—defensive wounds, items in the room overturned. Again, no close contact powder burns and/or stippling.

It’s safe to conclude the shooting took place from a distance, not at close range.

Through our investigation, we’ve learned there was no connection between the victim and her killer. Security video shows no one else entered the store other than Bald Man and the witness.

By proving the potential defense theories wrong, we’ve now bolstered our murder case against the bald man.

4. MOM – Motive, Opportunity, and Means

Now that we’ve definitely set our sights on Bald Man as the probable killer, it’s time to dig deep into the box to begin pulling out the puzzle pieces featuring specific details. So let’s call on MOM to help.

M = Motive. At this point, we don’t know the motive so we have to begin a search of the suspect’s personal history (gambling debt, robbery, infidelity, etc.). Detectives will attempt to learn the motive as the investigation progresses.

O = Opportunity. Check. We know that Bald Man was there at the scene of the crime.

M = Means. Check. Bald Man definitely had a gun.

In addition to MOM, there are a few other considerations on our handy checklist, such as:

Intent – Did Bald Man intend to kill the clerk? Ties to motive.

Plan – Did Bald Man plan to kill the clerk? Was this a premeditated act? If so, why? Ties to motive.

Preparation – Did Bald Man take steps to carry out his plan? Did he stockpile ammunition. Did he try to hire someone to commit the murder for him? Get his affairs in order in case he’s caught and goes to jail.

All of these details will be revealed during a thorough investigation.

5. First Responders.

It’s important to alert, train, and beg first responders—patrol officers, EMS, fire, etc. to not muddy up the crime scene by moving, tainting, disrupting, contaminating, or handling evidence.

6. The Crime Scene.

The back room of the dry cleaners is where the shooting took place, therefore it is the primary crime scene, or scene of the crime.

Suppose Bald Man hides the pistol in a dumpster down the street and it’s found by garbage collectors who alert police to their discovery. The dumpster is then a secondary crime scene, or simply a crime scene. Anyplace where evidence of a crime is found is considered to be a crime scene or secondary crime scene. Investigators should label each of those locations appropriately and orderly (Secondary Crime Scene A – dumpster at corner of Main and Killer, Secondary Crime Scene B – top dresser drawer in master bedroom of Bald Man’s residence at 666 Manson Lane, etc.).

7. Sometimes it’s best to work a case in reverse by ruling out potential suspects who couldn’t have committed the crime. Then, when all is said and done, the last man standing, so to speak, is the killer.

So there you have it, a few of the basic steps to solving a murder puzzle.

Finally, click the link for a detailed list of Homicide Investigation Do’s and Don’t’s. 

_________________________________________________________________________________________

In case you’re still concerned about the “victim” in the above photo, here she is again enjoying a bite to eat between classes at the Writers’ Police Academy.

2011-09-24_10-04-25_206

The makeup used in these workshops is extremely realistic.

Did you know …

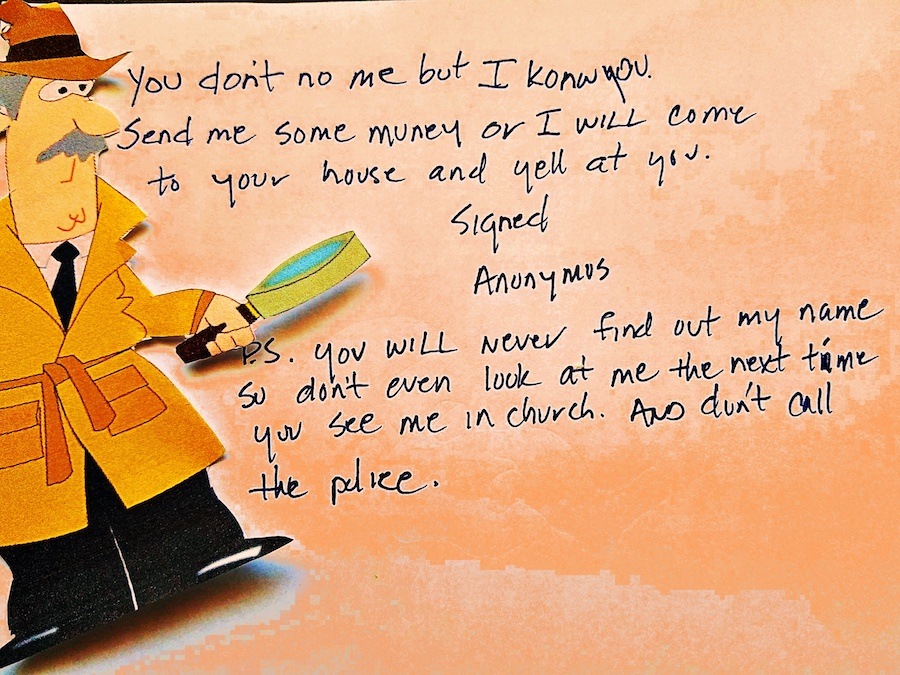
The FBI maintains an Anonymous Letter File. The file is searchable and contains images of anonymous and threatening letters. Letters may be examined and compared to those from other cases. Original documents are preserved in the manner in which they were received. They may not be folded, stamped, written on, handled excessively, or altered in any way. Avoiding these problematic issues preserves unseen evidence, such as indented writing.

Bank Robbery Notes – Like the Anonymous Letter File, the FBI also maintains a searchable file containing images of notes used in bank robberies (“Gimmie all your money,” signed I.M. Wearingamask). Notes may be compared to others used in other robberies. Original notes are preserved in the condition in which they are received. They, too, are checked for unseen evidence.

Bullet Examinations

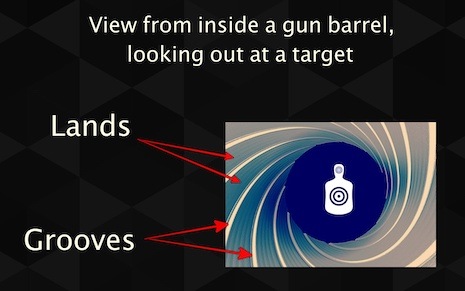
The FBI’s Forensic Services is available to examine fired bullets. Measurements collected are—bullet weight, specific design, caliber, direction and characteristics of the grooves (rifling) carved into the bullet by the lands and grooves formed into the barrels of rifles and handguns.

Lands are the raised portions between the grooves inside the barrel. They’re formed after the spiral grooves are cut to produce the rifling.

Bullets collected as evidence must be packaged separately to prevent contacting other bullets and/or other objects. Bullets are generally soft and easily marred by contact.

Spy Stuff!


Coded messages are sometimes used by criminals such as terrorists, gang members, and even prison inmates. They devise the secret codes to relay messages they want to conceal from authorities and rivals/enemies.

Cryptanalysis

Knowing the content of these hush-hush communications is key to solving crimes and sometimes protecting life. Therefore, the FBI employs a team of Code Breakers whose job is to decipher the encrypted notes. They often find directives of murder, prison escape, confessions to crimes, drug activity, and more.

Collecting DNA Evidence – Bone, Tissue, Teeth

The FBI is quite specific about the evidence samples needed to complete proper testing/examination. The requirements for bone, teeth, and tissue are as follows:

  • Submit whole bones, if possible. Cutting increases the risk of contamination
  • Pick up bone and teeth using a clean gloved hand or some type of forceps
  • Teeth are to be collected in order of preference for testing
  1. molar (no dental work)
  2. premolar (no dental work)
  3. canine (no dental work)
  4. front tooth (no dental work)
  5. molar (restored)
  6. premolar (restored)
  7. canine (restored)
  8. front tooth (restored)

Tissue

Handle/pick up tissue with clean gloved hand or forceps. The ideal sample would be 1-2 cubic inches of red skeletal muscle, placed into a clean, airtight container. NO Formalin! Samples may be frozen, placed in Styrofoam containers along with dry ice and shipped overnight to the FBI lab.

This One’s For the Birds!

FBI experts are on hand to examine bird feathers. No, you didn’t imagine this. It’s very real. FBI scientists can determine species from feathers or bits of feather found on clothing, shoes, vehicles, etc. Then they compare those finds with feathers discovered at a crime scene. A positive match could place a suspect at the scene of a crime.

Feathers (evidence) are packaged in either paper or resealable plastic bags.


MURDERCON 2021

REGISTRATION IS OPEN!

2021 MurderCon takes writers behind the scenes, into places not typically traveled by anyone other than law enforcement and forensics experts.

I urge you to take advantage of this rare opportunity. It may not pass your way again.

MurderCon is a “killer” event!

www.writerspoliceacademy.com

Seats at this unique event for writers are LIMITED!


Research is the name of the game if a crime writer’s goal is accuracy about a particular aspect of their story, such as murder, cops, and investigations of crimes. Unfortunately, some writers avoid any and all cop-type research, believing they already have all the answers because they watch crime shows on television, and/or their BFF’s cousin’s next door neighbor once lived in the same town as a guy who used to work with a woman who dated the brother of a man who once stood in a grocery store checkout line next to a police detective’s auto mechanic. Well, that sort of connection won’t quite cut it if the desired result is realism.

So, to assist writers who may have incorrectly used one or more of the terms listed below, well, here you go. Yes, I’ve seen each of these used incorrectly. For example, no, transient evidence is not the evidence left behind by homeless criminals …

ABFO Scales: (American Board of Forensic Odontology scales). An L-shaped piece of plastic used in crime scene photography. Scales are marked with circles, black and white bars, and gray bars. These markings aid in distortion compensation and provide exposure determination. Measurements on the scales are typically marked in millimeters.

Bindle Paper: Paper that’s folded to safely contain, store, and transport trace evidence.

Crime Writer: Person who commits multiple murders within the narrow confines of book covers. Crime writers are known to leave behind scores of evidence and sometimes a handful of cliches.

Faraday Bag: Special collection bags for electronic parts. Faraday bags are lined to protect the contents from electromagnetic forces that could damage or destroy evidence.

Historical Fiction: The official residence of cordite. Actually, historical fiction is the ONLY place where cordite and its odor should be used by writers.

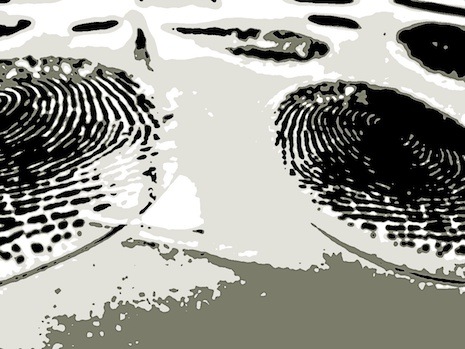
Latent Print: A print that’s not readily visible, or one that’s visible only by enhancement.

Odor of Cordite: An imaginary odor detected only by modern writers who should know better … but don’t.

Porous Container: Packaging through which liquids or vapors may pass (cloth, paper, etc.).

Presumptive Test: A non-confirmatory test used to screen for the presence of substances such as drugs or blood. Test kits used by officers in the field are presumptive test kits. Confirmation testing is conducted in official laboratories by trained and/or certified professionals.

Primary Crime Scene: In homicide investigations, the place where the body is found is the primary crime scene. Typically, this is where the investigation begins. Keep in mind, though, there may be multiple crime scenes (crime scene – any place where evidence of a crime is found).

Scene of the Crime: The location where a crime was committed.

Slide-Racking: The totally unbelievable action of pulling and releasing the slide on a semi-automatic pistol just prior to engaging a dangerous situation. Cops carry guns with a round in the chamber. To rack the slide would eject the pre-loaded round leaving them with one less bullet.

Tertiary DNA: DNA can be accidentally transferred from one object to another. A good example could be the killer who shares an apartment with an unsuspecting friend. He returns home after murdering someone and then tosses his blood-spatter-covered shirt into the washer along with his roommate’s clothing. The machine churns and spins through its wash cycles, an action that spreads the victim’s DNA throughout the load. Police later serve a search warrant on the home, seize the clothing, and discover the victim’s DNA on the roommate’s jeans. The innocent roommate is arrested for murder.

Tertiary Transfer of DNA Evidence

The same can occur with touch DNA. A man shares a towel with his wife and his DNA is subsequently transferred to her face and neck. Later, a stranger wearing gloves chokes the woman to death, transferring the husband’s DNA from the victim’s face to the killer’s gloves. The assailant removes the gloves and leaves them at the scene. Police confiscate the gloves, test them, and find the husband’s DNA. He is then charged for his wife’s death while the real killer is free to murder again.

The example above (the choking case) actually happened, and those of you who attended the Writers’ Police Academy session taught by DNA expert Dr. Dan Krane heard him speak of it. He was the expert who proved this was indeed possible and he testified to it in the groundbreaking case involving accused killer Dr. Dirk Grenadier.

Transient Evidence: Evidence which could lose could lose its evidentiary value if not preserved and protected from the elements or other hazards (blood, semen, etc.). This is not evidence left behind by homeless people. It could be, though, if the killer just happened to be someone who lives on the streets. If so, the items collected could then be called transient transient evidence.

White Horse Syndrome: No,  FBI special agents do not ride into town on white horses to take over cases from local cops, nor do they work local murder cases. And … they do not investigate all kidnapping cases. Many writers, bless their hearts, are infected with White Horse Syndrome (WHS). Fortunately, it’s an easily curable disease. Unfortunately, though, some refuse to seek help.

If you or someone you know is affected by WHS, immediate intervention is needed.

To help battle WHS I strongly urge you to attend the upcoming Writers’ Police Academy Online daylong seminar “Mystery and Murder: Transforming Reality into Fantastic Fiction.” In this session you’ll learn behind the scenes tips, tactics, and techniques used by top crime scene investigators Lisa Provost and Lisa Black. Also, forensic psychology expert Dr. Katherine Ramsland is scheduled to teach a fascinating workshop about staged homicide scenes.

Then, in a rare learning opportunity, #1 bestselling author Tami Hoag wraps up the event with her class “Not Just the Facts, Ma’am.” Hoag’s amazing workshop details how to carefully weave all your newfound knowledge of police and forensic work into your story.

Attending Writers’ Police Academy Online classes could be the important first step on the road to recovery from the dreaded White Horse Syndrome.

Registration details and an all new website are coming soon.

In addition to Tami Hoag’s session, other classes include:

“Little Known Facts About Crime Scenes” – instructor Lisa Black.

Lisa Black is the NYT bestselling author of 14 suspense novels, including works that have been translated into six languages, optioned for film, and shortlisted for the inaugural Sue Grafton Memorial Award. She is also a certified Crime Scene Analyst and certified Latent Print Examiner.


“Sleuthing the Clues in Staged Homicides” – instructor Dr. Katherine Ramsland.

Katherine Ramsland teaches forensic psychology at DeSales University, where she is the Assistant Provost. She has appeared on more than 200 crime documentaries and magazine shows, is an executive producer of Murder House Flip, and has consulted for CSI, Bones, and The Alienist. The author of more than 1,000 articles and 68 books, including How to Catch a Killer, The Psychology of Death Investigations, and The Mind of a Murderer, she spent five years working with Dennis Rader on his autobiography, Confession of a Serial Killer: The Untold Story of Dennis Rader, The BTK Killer. Dr. Ramsland currently pens the “Shadow-boxing” blog at Psychology Today and teaches seminars to law enforcement.
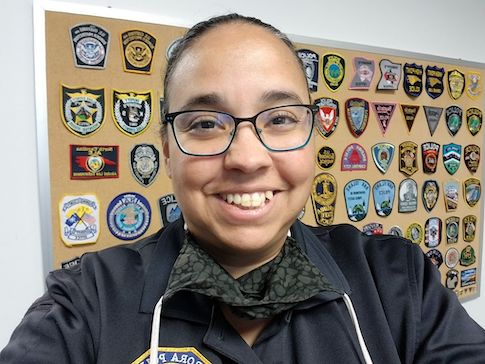

“The Call You Get is Not Always the Call You Get: When a Routine Death Investigation Crosses State Lines and Multiple Jurisdictions” – instructor Lisa Provost, Forensic Supervisor at Aurora Colorado Police Department.

Lisa has completed over five-hundred-hours of forensic training that includes basic death investigation, child death investigation, advanced child death investigation, and officer-involved shooting investigations.


Tami Hoag is the #1 International bestselling author of more than thirty books published in more than thirty languages worldwide, with more than forty million books in print. Renown for combining thrilling plots with character-driven suspense, crackling dialogue and well-research police procedure, Hoag first hit the New York Times bestseller list in 1996 with NIGHT SINS, and each of her books since has been a bestseller, including her latest, THE BOY. She lives in the greater Los Angeles area.



Here’s a brief video of crime scene processing, photography, and evidence collection.

“To Protect and Preserve.” Those are the words that should be on the mind of every officer who responds to the scene of a homicide.

First responders have an immense responsibility. Not only do they have to assess the situation in a hurry—the victim may still be alive—-, the possibility of the killer still being on scene is quite probable. And, those officers must realize that the key to solving the case—evidence—must be protected. So, while facing the threat of personal harm and saving the life of others, patrol officers practically need to step through the scene as if walking on eggshells. That’s not asking too much of them, right?

Keep in mind, there’s no set-in-stone method of investigating a murder because no two scenes are identical. And, no two officers/crime scene investigators think exactly alike. However, there are certain things that must be done, and there are mistakes that must not me made. Here are a few pointers.

The Dos

1. First responders must proceed to the scene as quickly and safely as possible. Why? Possibly catch the bad guy and to prevent the destruction/removal of evidence.

2. Quickly start the crime-solving wheels in motion by contacting the necessary parties, such as investigators, coroner, EMS, etc.

3. Arrest the suspect, if possible.

4. Document EVERYTHING.

5. Preserve and collect evidence.

6. Assume that EVERYTHING is potential evidence.

7. Secure the scene. Absolutely no one is allowed to enter who’s not a key person in the investigation.

8. Treat every single suspicious death as a homicide until the investigation proves otherwise.

9. Keep an open mind.

10. Photograph, photograph, photograph!

11. Study the victim. Learn everything there is to know about them. Know them. Know what they ate, what they liked to do, where they liked to go, who they liked and disliked, who liked them and who hated them, etc. Uncover every single detail of their life. The victim is often the single most important piece of evidence in the case.

12. Share information with members of your investigative team. Bounce thoughts and ideas around among the group. Talk to everyone involved—patrol officers on the scene, the coroner, other investigators, the crime scene techs, etc.

The Don’ts

1. Do not assume anything. Sure, the call came in as a suicide, but that doesn’t mean that’s what actually happened. That’s merely what a witness told the dispatcher. And definitely do not assume there are no weapons present at the scene simply because that’s what your dispatcher told you. Again, he/she was given that information by someone at the scene who may not know.

2. Do not assume the suspect has left the scene. Treat everyone there as a possible murderer until you learn differently. Be smart and be safe.

3. Do not allow anyone to leave the area until you’ve interviewed them. Treat everyone as a possible witness. Sometimes people don’t realize they’ve seen an important detail.

4. Failing to secure a scene could wind up as a disaster. Family members have a tendency to get in the way, thus destroying vital evidence. They feel the need to be a part of the scene. They want answers. Some are combative and want to blame and fight others. Therefore, absolutely do not allow anyone inside the scene. This includes members of the police department if they’re not part of the investigation. And I mean everyone, including the mayor, the chief, the sheriff, etc. (The last one’s easier said than done, right deputies?). If the boss insists then have them sign the log before stepping beyond the perimeter boundary line.

5. Releasing information to the media. Hold your cards close to your chest until you have an idea of what information can be released to the public. Remember, what you say will be on the evening news!

6. Don’t get a case of tunnelvision. Keep your mind open to everything, at first. Then as the case starts to come together the focus of the investigation will narrow. A murder investigation works like a funnel. First you dump all you’ve found into the large end. Then you keep pushing and pushing until finally the killer’s name pops out of the other, smaller end.

7. Failing to take enough notes and photographs could later haunt you in ways one can only imagine. You only have one shot at this, so take more notes than you think you could possibly need while the scene is still intact. There are no do-overs.

8. Don’t take sloppy notes and keep sloppy records. Remember, what you write down and/or record could/will eventually be seen in court. Your records will be a reflection of how the investigation was conducted. Clean notes = a clean, tight investigation.

9. Don’t discuss a case where members of the general public have an opportunity to hear the conversation! Words are too easy to misunderstand and that can come back to bite a detective in the…well, a place where the sun doesn’t shine. Think about a trial witness who says to the judge and jury, “Yes, I heard the detective say …”

10. Again, a case is not a suicide until the investigation proves it is. How many murderers have “gotten away with it” due to lazy officers conducting slipshod investigations? Sure, it’s easy to take a peek at a victim and assume suicide. But every case should warrant a closer look. You never know, especially if the circumstances are suspicious. And never discount that detective’s “gut feeling,” the investigator’s 6th sense.

11. Do not rush into a crime scene without first taking everything in. Take a moment to assess the area. Are there any dangers, including hidden ones, such as gas leaks, poisonous chemicals, A KILLER WITH A GUN?

12. Don’t assume the victim is dead. Check for vital signs. You certainly don’t want him to lie there suffering while you stand around waiting for the coroner. A few seconds could be the difference between life and death.

13. Don’t assume that the cooperative witness with the happy face is innocent. He could very well be the killer. If so, arrest that clown!


Cops who desire to produce results—discover hidden contraband—when conducting searches of homes and other buildings absolutely must learn to think like bad guys. It’s a must if there’s any hope of locating well-concealed evidence.

Sure, some crooks lack imagination and leave the fruits of their crimes out in the open for all to see. Others leave evidence on tabletops, on beds, in the living room floor, etc. simply because they believe they’re untouchable.

However, some criminals prefer that police not discover their stash of secret weapons, drugs, stolen jewelry, and other incriminating evidence. Therefore, they hide the goods. And when doing so, well, they sometimes select some cleverly camouflaged spots, such as …

Hidey-Holes

  1. Hanging, taping, securing objects above the inside doorway/entrance to a closet. More times than I’d care to count, officers simply do not look there when searching small closet spaces that are not large enough to step inside. Instead, they tend to examine the obvious—straight ahead, above, below, and on shelving. They paw through hanging and folded clothing items, shoes, clothes hampers, the floor, etc. But above the doorframe…not so much.
  2. The bottoms of furniture, including inside the undersides of sofas and chairs. The cloth material attached there is easily removed simply by popping off a few staples to reveal a huge hiding spot among the framework. Crooks sometimes conceal drugs or guns or other items inside these cavernous spaces; therefore, officers should look for signs of tool marks that reveal tampering with staples, tacks, or other fasteners.
  3. Speakers (surround sound, stereo, etc.) are an excellent spot for hiding items. They’re basically wooden boxes with front or back covers that are often easily removed, exposing decent size hidey-holes.
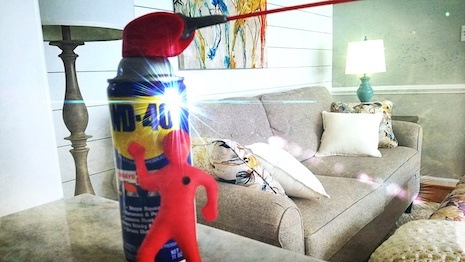
  4. Fake aerosol cans, wall clocks, vegetable cans, beer cans, and so, so much more. Anyone can purchase a vast assortment of faux containers that look like a typical product found in a typical home. I once discovered a spray can of “WD-40” whose bottom screwed off to reveal a hollow space containing a hefty-size plastic bag filled with cocaine. (Click the link in this paragraph to see some of these items).
  5. Fake or hollowed-out books inserted among dozens of everyone’s favorite reading material. Yes, right there between the latest Reacher adventure and copies of Heather Graham’s and Tami Hoag’s books could very well be a stolen SIG Sauer hidden inside a scooped-out copy of Louise Penny’s A Better Man.
  6. Cutout sections of floors or wall paneling are excellent places to conceal goods. The space inside a standard wall is typically the size of the building material used (2x4s, for example). Wall studs are generally placed 16″ apart which offers a hiding space of 4″ deep by 16″ wide. The height of the space could be as tall as 4 feet, or so, since a short section of 2×4 is installed horizontally at the mid point of a wall (more are installed if the ceiling height is over 8 feet). These cross pieces provide support as well as something permanent to attach wallboard at the center point (from ceiling to floor) of the wall. During a search of a home (for drugs) members of our team discovered a removable portion of paneling that concealed a sawed-off shotgun hidden inside a wall between a family den and a kitchen. The illegal weapon fit nicely inside the spaces between 2×4 wall studs.
  7. Window air-conditioning units have removable front covers that reveal small but handy hiding spots. However, if the items hidden are drugs it’s quite easy for a canine to discover the illegal substances. This is especially so if the unit is running because the fan helps push the odors out into the room(s). To a trained narcotics dog that’s like switching on a neon sign that reads “DRUGS ARE HERE!”
  8. I’ve mentioned this one before, the space behind light switch and receptacle covers, but will do so again in case someone missed it. It’s a small spot but is one where tiny items such as flash drives, narcotics, and jewelry could be concealed. Also, click here to view a totally fake receptacle that’s actually a wall safe.

What’s in Your Wall?

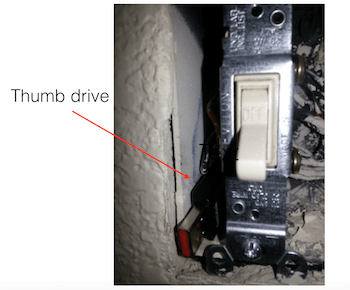
Removing the plastic wall cover to reveal a thumb drive concealed inside the electrical box housing wall light switch.


We all know how the story goes. A sly, blowhardish and extremely hungry wolf arrives at the front doors of the recently created homes of three very handy pigs, a trio of walking porkchops who’d built their individual abodes on prime pieces of suburban real estate.

The first pudgy, and not so construction-savvy pig fashioned his home from straw, and if you’ve watched HGTV lately you’ll recall that while inexpensive straw homes are susceptible to rot due to high moisture content, fire, and to the difficulty of obtaining homeowner insurance.

I imagine our first little porker thumbed his flat little nose at the rules, and safety, and bypassed the permitting process. I also believe he overlooked the possibility of wind damage and quickly learned of his error shortly after the wolf announced his presence on the front stoop.

“Little pig, little pig won’t you let me come in?” the mangy wolf cried out to pig number one.

“No, no, no, by the hair on my chinny, chin, chin,” said the worried hog.

Well, you know what happened next. The wolf, of course, huffed and puffed and in a matter of seconds enjoyed a tasty pulled pork appetizer.

The twisted and curly “tail” continues with the wolf’s forceful exhalations destroying pig number two’s stick-built home. As a result … pork roast for the entire Wolf family. And, as before, he’d gotten away without leaving a clue. Not even a paw print.

Then the murdering wolf, now deemed a serial killer by the local media, moved on to his next intended victim, the pig who lived in the brick rancher at the corner of Garlic and Rosemary Avenues.

Exasperated police almost captured the wolf thanks to a 911 call from the couple next door, Porky and Petunia, who’d seen the sneaky canine approaching pig number three’s doorstep. But, as bad luck would have it, the wolf escaped on foot, well, on four feet, actually.

The wolf was careless, though, during his third attempt at pig-killing. He’d forgotten it was the time of year when his species sheds their winter coats. Yep, you guessed it. Cops collected a few discarded hairs and subsequently rushed them to the lab where scientists immediately began testing them using an astonishing new process. They ‘d know the identity of the killer very soon. But this is fiction …

The Real Meat of the Story

Okay, the tale above is a bit stupid, I know. But I wrote it as a prelude to the true subject matter of the day—identifying a criminal suspect using his or her shed hairs found at a crime scene.

It’s fairly common knowledge that scientists and other lab experts, as well as law enforcement investigators and writers, are already familiar with the use of human hair from the head as a source used to identify people through DNA testing, etc. Suppose, though, that any hair from any part of the body could be used to identify the person who shed it, not just hairs from the head. To have this capability would be HUGE in the real world of crime-solving.

Sure, writers make up stuff like this all the time to help tie up loose ends in their books. After all, Jack Reacher, Bosch, DD Warren, and Tami Hoag’s Detectives Fourcade and Broussard, well, they’re unstoppable because their creators make it so. But actual cops must use actual evidence and actual crime-fighting tools and equipment to locate killers, such as the extensive catalog of items developed and manufactured by Sirchie.

But here in the world of genuine cops and murderers, the use of wishful thinking and fictional methods and procedures is not an option that’s available to local, state, and federal law enforcement.

However, thanks to a group of researchers, fiction is now a reality.

Yes, a groundbreaking technique of human identification using hairs from ANY part of the body is now possible. It’s the result of a yearlong study by researchers from Lawrence Livermore National Laboratory’s Forensic Science Center and Michigan State University.

The process interprets hair protein chemistry and how it effects protein marker identification.

Chemist Fanny Chu, a graduate student and researcher at MSU, along with other researchers involved in the Lawrence Livermore/Michigan State University study, took the hair testing process a step further by studying and comparing arm and pubic hair with head hair. The result—the hairs fundamentally presented the same data as head hair.

Additionally, the protein content of the hairs indicate whether a single hair is from a person’s head, arm, or pubic area, etc.

The team also learned that the protein content of pubic hair is appreciably greater than head and arm hair.

A single one-inch strand of hair has a unique pattern, much like DNA or fingerprints, that distinguish a person from among a population of 10 million people.

Fun Fact: Human hair proteins are chemically more stout than nuclear DNA. In fact, scientists have detected protein markers in human hair that’s more than 250 years old.


SIRCHIE

Sirchie products (mentioned above) are used by law enforcement professional worldwide. Additionally, they’re often seen in use by CSIs and detectives on popular television show/series.

In August, just a few weeks from today, writers, fans, and readers will have the opportunity to attend hands-on homicide investigation training sessions at Sirchie’s elite compound near Raleight, N.C. The event, MurderCON, is brought to you by the Writers’ Police Academy and Sirchie. It’s a rare opportunity to learn at a world-renowned facility in classes taught by some of the best instructors in the world. I cannot stress enough how extremely valuable attending MurderCon could be to the knowledge base of crime fiction writers.

The material offered at MurderCON is the identical material taught to top investigators from around the globe. Not only that, classes are scheduled at Sirchie’s facility, the source of crime scene investigation tools and equipment. It’s where ideas are conceived by researchers and are then brought to life by developers and scientists. Next, a team of experts fabricate assemble everything from fingerprint brushes and powders to fuming chambers, alternate light sources and even surveillance vehicles.
The subject material offered at MurderCon has never before been made available to the public.
Again, this is a RARE chance to go behind the scenes, affording you, the writer, to add better realism to your work by experiencing the touch, sight, smells, sounds, and even tastes associated with crime scene investigations. This is the key to activating the senses of your readers!!

We’ve nearly reached maximum capacity for the 2019 MurderCON event; therefore, registration will soon close. So again, I urge you to consider taking advantage of this unique opportunity. It’s a KILLER event!

Sign up today at:

MurderCON

See you in August!

Detective Pete Gitterdone had a spotless attendance record, never missing a day for sickness during his entire thirty-three years with the department. He was so proud of his achievement, in fact, that he refused to stay at home on this particular day, a time when his fever hovered at 102.

Coughing and sneezing fits forced him to spend the majority of the morning with his mouth and nose buried deep into a crumpled, crud-dampened, and extremely yucky handkerchief.

Gitterdone, feeling all achy and fatigued, was busy collecting suspected blood samples (brownish red stains for the official record) at a particularly brutal homicide scene, alternating between hacking and achooing, when his partner, Detective I. Lergictowork, told him he looked sickern’ a dog, like death warmed over, and asked if he needed a break.

Gitterdone promptly turned his head away from his partner and fired off a round of wet sneezes directly into the large paper bag of already-collected evidence. “No,” he said. “I’ll be okay. Besides, I’m almost done. Just a couple of prints to lift and I’m outta here.”

He tipped his head toward a desktop where a few sheets of yellow legal pad paper sat among a scattering of pencils, pens, and colored paperclips. “Looks like the suspect might’ve touched these papers,” he said. “How ’bout handing me a can of Ninhydrin. There’s one in my kit.”

Ninhydrin reacts with amino acids to produce a purple reaction product called “Rhuemann’s Purple”. It is useful on porous surfaces—especially paper. ~ Sirchie

So, did you notice anything particularly wrong with Gitterdone’s method of evidence collection? If so, what?

After watching these two work, well, it might be a good idea to have both Gitterdone and Lergictowork read this list of Crime Scene Do Nots. It might help to have your protagonist take a peek as well.

Crime Scene DO NOT’S

1. Do Not blow away excess fingerprint powder! Doing so adds your DNA to the surface.

2. Do Not use Styrofoam to package electronic devices (computer parts, etc.) because it can cause static charges. Instead, use foam padding or bubble-wrap.

3. Do Not alter or add anything to a crime scene sketch after leaving the scene. Memories are not quite as accurate as we may think.

4. Do NOT place bloodstained evidence in plastic bags. Plastic bags and containers can serve as incubators for bacteria, which can destroy or alter DNA. Rule of thumb – paper bags/containers for wet evidence (blood, semen, saliva, etc.) and plastic for dry evidence.

5. DO NOT collect DNA evidence samples (saliva, blood, etc.) from a criminal suspect without a court order, the suspect’s consent, or during exigent (emergency) circumstances.

6. Do NOT cough, sneeze, exhale, etc. over any evidence sample. This also includes talking over a sample. With each word spoken comes your DNA that’s instantly transferred to the sample.

7. Do NOT fold wet documents. Leave that to the professionals in the lab.

8. Do NOT use fingerprint tape or lifters to collect bits of trace evidence. The adhesion on print lifting tape is insufficient for picking up tiny bits of evidence.

9. Do NOT use dirty digging tools when collecting soil samples. Always clean tools thoroughly after each use to avoid cross contamination.

10. Do NOT use fingerprint lifters in lieu of gunshot residue (GSR) collection materials. (see number 8 above)

441

Fingerprint lifter – Sirchie image. I used Sirchie lifters all the time during my career. In fact, I still have a few leftover from my crime-solving days.

11. Do NOT allow shooting suspects, victims, witnesses, etc. to wash their hands or rub them against other surfaces until after GSR tests/collection have been completed.

12. ALWAYS remember #6 – Do NOT cough, sneeze, exhale, talk, etc. over any evidence sample.
Hapci-fr


Bonus – Transferred Prints

Do NOT write a transferred fingerprint scene without first giving it a ton of serious thought. Here’s why:

Yes, it is indeed possible to transfer a fingerprint, even accidentally. However, a skilled examiner should be able to spot duplicates since they tend to appear very thin and thready. Also, the background area surrounding the “new” print may not match the surface of the place where the transferred print was left. Background pattern(s) transfer along with the print.

Here’s where writers often make their mistakes when setting up characters to “take a fall” for another character. Transferred prints are mirror/reverse images and would be easily recognized by a skilled examiner. It’s possible, though, that an inexperienced print examiner, one who’s new to the field, may not catch it right away. But that scenario is highly doubtful.


BIG, BIG, BIG Writers’ Police Academy news is on the way. The 2019 WPA is a special event, one unlike anything we’ve presented in the past. And when I say special, I mean it’s over the top S.P.E.C.I.A.L.! I am so pleased and thrilled to present such an exciting opportunity for writers. This has never been done before, not ever!

For now, though, I’d like to share the dates and the location so you can make plans to attend. Please keep in mind that due to the nature and location of this unique program space/slots are limited. We’ll soon begin to announce more specific details but, for now …

Date – August 1-4, 2019

Location – Raleigh, N.C.


Evidence = The thing or things that furnish proof.

Proof = Something that establishes the validity of truth.

Truth = A body of real things.

Real Things = Evidence.

Okay, now that we’ve established the fact that evidence is/are real things that offer proof of the truth, let’s examine a few places where police investigators sometimes find those real things.

Above all, though, before beginning the death scene investigation detectives should first check for signs of life. There’d be nothing worse than wrapping up a crime scene investigation and then have the victim sit up and tell you that you’d missed the most obvious clue of all … a heartbeat.

The savvy detective knows to always look up, down, and all around. After all, tunnel vision can be a cop’s worst enemy in more ways than one. Detectives also know to never smoke, chew gum, eat, or drink while inside a crime scene, and that’s because doing so could deposit “real things” that crime scene techs could be confuse with actual evidence, such as cigarette ashes or a gum wrapper.

And, since there are no “do-overs” with a crime scene, you only have one shot at it before the scene is forever altered. Remember Locard’s Principle from yesterday’s article—“always, without fail, when two objects come into contact with one another, each of those objects will take something from the other or leave something behind.”

A head-to-toe visual exam of the body/victim includes making note of its position and if there’s something abnormal, such as an arm or leg in an unnatural angle. The eyes. Are they open or closed? Any obvious signs of a struggle. Defensive wounds on the hands?

Check for lividity. Is it fixed? If so, where does it show up. Lividity, when present, should appear at the lowest points of the body. If not, that’s an indication that the body was moved after death.

Lividity

Lividity, aka Livor Mortis is the pooling of blood in the lowest portions of the body. It’s caused by gravity and begins immediately after death. The telltale signs of livor mortis, the purplish discoloration of the skin, begins the moment the heart stops pumping. This process continues for approximately 6-12 hours, depending upon surrounding conditions, until it becomes fixed, permanently staining the tissue in the lowest parts of the body. When large areas become engorged with lividity, the capillaries in those areas sometimes rupture causing what’s known as Tardieu spots. Tardieu spots present as round, brownish blacks spots.

Lividity can help investigators determine an approximate time of death. The staining of tissue normally begins within the first two hours after death. The process reaches it’s full peak (fixed) in eight to twelve hours.

If the victim is moved during the first six hours after death the purplish discoloration can shift, causing the new, lowest portion of the body to exhibit lividity.

After a period of six to eight hours after death, when lividity becomes totally fixed, the patterns of discoloration will not change. Therefore, investigators know a body found lying face down with lividity on the back, has been moved.

Rookie officers have often confused lividity with bruising caused by fighting.

Remember, ambient air temperature is always a factor in determining the TOD (time of death). A hot climate can accelerate lividity, while a colder air temperature can slow it down considerably.

Missing Jewelry

Before bagging the hands (use paper bags) to preserve any evidence that may be located around and beneath the fingernails, investigators should carefully examine the hands and wrists, visually, making note of marks or other indications that jewelry had been worn, such as a tan line or indentation on the ring finger. This is a sign that robbery could have been the motive for the death. And that the missing items may appear on an upcoming pawn shop daily report. In most areas, pawn shops are required to submit a daily list of all items purchased. This aids police in tracking down stolen merchandise.

Paper bags are used for bagging the hands because plastic aids in the incubation process of bacteria and, as you know, bacteria growth accelerates decomposition. Bacteria can also destroy DNA.

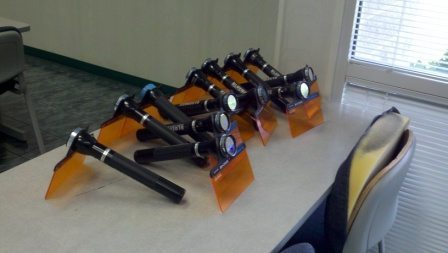
Alternate Light Sources (ALS)

The use of various alternate light sources are used to detect stains and body fluids, fibers, and even fingerprints, all evidence that’s often not visible to the naked eye.

ALS equipment/RUVIS – Sirchie ~ 2018 Writers’ Police Academy


RUVIS (Reflective Ultraviolet Imaging System), a system of locating latent (invisible) fingerprints) without the use of powders, fumes, or chemicals, was developed by Sirchie Fingerprint Laboratories, a sponsor of the Writers’ Police Academy, and the U.S. Army. The system focuses on one specific section of shortwave ultraviolet light, the germicidal spectrum of light, which cannot be seen by the naked eye.

A particularly unique feature of RUVIS technology is that it works in both total darkness and in bright sunshine, a must for use by police investigators.

Sirchie’s Krimesite Imager uses RUVIS technology to detect invisible residues from fingerprints. Those residues reflect UV light projected from the device, which immediately captures the reflections with a 60mm UV lens. A built-in scanner then converts the images to visible light, allowing the investigator to see the fingerprint. All this is done instantly, in real time. And, the detective is able to see images from up to fifteen feet away.

Once the print is located, the investigator uses the Imager to photograph it and, with the use of a micro-printer, print a copy of the desired evidence. All this without the messy powders that never seem to wash away. The KS Imager can also be used to greatly enhance prints developed using cyanoacrylate fuming (Super Glue).

*By the way, keep your eyes and ears open for a major announcement regarding the Writers’ Police Academy and Sirchie. You are going to lose your minds when you hear the news!

Bloodstain Patterns

Characteristics of a blood drop

  • blood drops are formed by gravity
  • blood drops cannot break apart unless contacted by an outside force
  • larger drops travel further than smaller drops (due to mass, not size)
  • blood drops always travel in an arcing path (impact injuries)
  • size ranges from a few millimeters to few centimeters
  • volume of a drop of blood is in direct proportion to whatever it’s dropping from (ax, stick, arm, leg, etc)

Crime scene investigators typically measure bloodstains that hit surfaces on the way up, not stains made by blood that’s on its way back down. Stains made when traveling upward are much more accurate for use as evidence because gravity is not as much of a factor in the pattern’s formation.

Types of Bloodstain Patterns

Impact – caused by high-velocity or medium-velocity wounds—gun shots or blows by an object such as a baseball bat or hammer.

Swipes (Wipes)Caused by a bloody object being wiped across another surface. These stains are the reason for changing the name of the examination from “blood spatter” evidence to “bloodstain” evidence (not all patterns are caused by airborne drops of blood). Remember that in your writing. Patterns caused by spattering, splattering, or wiped-on blood is no longer called “blood spatter.”

Therefore, your characters should reflect the change, as have their real-life counterparts. An example of the change:

Detective Sergeant Catchemall studied the bloodstain pattern on and next to the ticking cow clock hanging on the kitchen wall. He stood there, staring, for what seemed like an eternity before turning toward his partner, Ridley Perkins. Then he tipped his bald, oval-shaped head back toward “the cow wall” where reddish splotches and dots of once-oozing blood contrasted sharply against the freshly painted, snow white surface. The cow’s tail moved from side to side with each tick-tock of the timepiece.

Tick Tock …

“I believe, Ridley,” he said, “that our killer was right-handed, shorter than your own meager five-and-a-half feet, and was standing, not sitting, quite close to our victim, poor Mrs. Ima Ghostnow, when he pulled the trigger on what was most likely a revolver. That, my friend, is what I believe happened to our unfortunate victim.”

Tick Tock …

*Terminology could vary from one area to the next.


The Lingo

Cast-Off– Caused by slinging blood off objects in motion (a swing of a bloody hammer, or arm).

Drip and Flow– Caused when blood drops off one object onto another.

Projected– Caused by arterial spurts. Often seen in stabbings and cuttings.

The ability to effectively interpret bloodstain patterns is a science and an art. But, before investigators can dive into a crime scene, they must learn a bit of terminology, such as:

Angle of Impact– the angle formed between the direction of an individual drop of blood and the surface it strikes.

Back Spatter– blood that’s directed back towards the source of energy, such as a hand holding a firearm, or hammer.

Expirated blood – blood that’s forced from the mouth or nose where air (exhalation) is the propellant.

High Velocity Impact Spatter (HVIS)– bloodstain pattern caused by a high velocity impact, such as those caused by gunshots or fast moving equipment or machinery (saws, drills, etc.)

Point of Convergence – the point (two dimensional) where the direction of travel (blood droplets) intersect. Can be used to help determine where the victim was standing when the fatal injury was delivered.

Point of Origin –the point (three dimensional) where the direction of travel (blood droplets) intersect.

Stringing – a method used to determine the point of origin. Investigators tie strings at the blood drops, following the direction of travel. The point where the strings intersect is the point of origin. Lasers are sometimes used in lieu of strings.


Always look up, down, and all around

As I stated earlier, this rule of thumb is extremely important when search for evidence and it’s especially so when examining a scene for blood spatter. This includes the undersides of table tops and seat bottoms. The insides of door frames and windowsills. In fact, a peek inside a refrigerator can sometimes save the day when all else come up empty.

Yes, bad guys sometimes cannot resist the urge to grab a quick snack or something to drink while taking a break from dismembering their latest victim. Therefore, it’s not at all unusual to find a bloody fingerprint on the container of onion dip, or loose hair from the head of the killer that’s lodged between the Swiss cheese and plate of leftover hotdogs.

Spatter is often found on ceilings and overhead lighting. On doorknobs and bedroom slippers that sit by the fireplace.

Other bits of often overlooked evidence can be found under rugs or carpeting, behind light switch covers …

Removing the plastic wall cover to reveal a thumb drive concealed inside the electrical box housing wall light switch.

… inside statues, faux spray cans, sewn inside the hem of clothing and bath towels, inside appliances and handheld electrical gadgets, shoes and, well, you name it and a crook has probably hidden something there.

Locating evidence in an outdoor crime scene – this, my friends, is a topic for another day. In the meantime, remember to have the heroes of your stories to “always look up, down, and all around, because without fail, when two objects come into contact with one another, each of those objects will take something from the other or leave something behind.”

The evidence, proof and truth of the crime and who committed it, is always there. It’s up to the detective to find it.


Police often keep certain case details secret, away from the public and media. It’s nearly maddening, I know, to people who’d like to help locate a missing person. However, there is a purpose or two to keeping these important and oftentimes scant particulars, those known only to the perpetrator, out of public view. One is to afford police the opportunity to solidly place the suspect at the scene if the person in the hot seat mentions those undisclosed, key details during an interview with investigators.

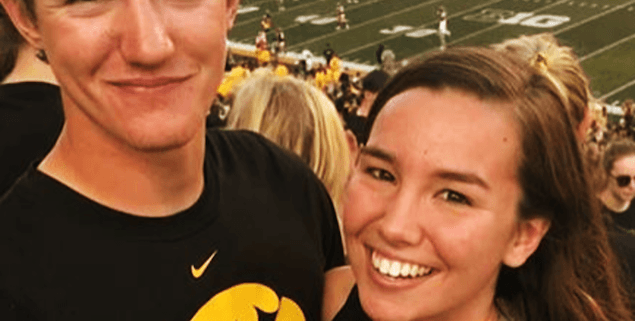
In the case of Mollie Tibbitt’s disappearance, it seems as if she vanished from the face of the earth without leaving a single trace. However, those who’re familiar with Locard’s Exchange Principle—theconcept that was developed by Dr. Edmond Locard—”that every time someone makes contact with another person, place, or thing, an exchange of physical materials takes place.” The item(s) could be as large as a footprint, a leaf, or a fingerprint, or as small as DNA, skin cells, or body fluid.

The same is true in reverse. The unsuspecting criminal, no matter how careful, will also take similar material away from the crime scene—carpet fibers buried in the tread of a shoe, DNA transferred to the suspect from an item only found in the apartment belonging to the victim, a unique plant seed stuck to the gas pedal of the suspect’s car, and so on. The list is nearly endless. Actually, I once solved a murder using soil and plant material found on a gas pedal and carpeting of the killer’s car. The material was unique in that its characteristics were exclusive to the location where the murder took place.

It’s quite possible that police have in hand one of those a tiny bits of evidence that would or could place a kidnapper or an accomplice in one of the five or six areas police have identified as locations of interest in the case of Mollie Tibbitts’ disappearance. Keep in mind, though, there may be other areas they’re keeping to themselves in hopes the suspect will relax, thinking police are not closing in, when in reality the net is slowly and methodically tightening as clues are revealed.

For the safety of Mollie Tibbetts, it’s imperative that a kidnapper, if this is indeed the case, not be alerted that police are hot on their heels. Desperation on the part of the criminal could led to an unfortunate end to the investigation.

On the other end of the spectrum are the people who confess to crimes they didn’t commit. These individuals often crave attention so badly they’ll march into a police station where they admit to crimes ranging from burglary to murder. When this occurs, it takes away from the valuable time needed to focus on real leads because each false-confessor’s story must be thoroughly scrutinized.

Others who falsely confess to crimes do so because they sometimes succumb to effective and often intense questioning tactics used by skilled police interrogators. For example, The Reid Technique, a method that utilizes three distinct components—factual analysis, interviewing, and interrogation—is designed to help eliminate those who aren’t good candidates as suspects for the crime in question. Once the pool of suspects is narrowed down to a single person, well, police typically have their man, or woman.

A person who seeks notoriety by falsely claiming to have committed a crime that’s receiving national attention will use the information announced by the news media to concoct a believable story. This is a second example as to why police closely guard some details about a case.

Regarding those false confessions, when the innocent confess to crimes they didn’t commit. We see this in cases where death row inmates are exonerated based on physical evidence, even after confessing to the crime. The same was true when John Mark Karr falsely confessed to killing Jon Benet Ramsey back in 2006. Karr’s DNA didn’t match the DNA found on the body of the six-year-old girl’s body. Or, in 1932, when over 200 people who confessed to abducting Charles Lindburgh’s infant son.

Several other factors contribute to confessions offered by innocent people. For example, after being subjected to lengthy, hours-long intense interrogation, some individuals simply become exhausted and profess guilt simply to end the process. In addition, police interrogators often “minimalize” the crime, making it seem less severe. The idea is to convince the suspect that it’s in his or her best interest to confess. And they often do.

Stress leads to false confessions. A person’s level of anxiety generally increases when accused of a crime they didn’t commit; however, those who are not guilty of the crime in question typically feel their innocence will allow them to breeze through the interrogation without fear. They feel protected by their guiltlessness. Unfortunately, this lack of concern sometimes puts them at risk to admit to a crime they didn’t commit because their guard is down, and they’re weary, which increases the likelihood they’ll succumb to a skilled investigator’s use of tried and true tactics and techniques.

With these factors in mind, police try to hold insider information to themselves, away from the public eye. It’s sort of like playing poker. The idea is not show your hand until the last card is dealt and all bids are in. Otherwise, the criminal, who is well aware of the details of the act, could call their bluff and literally get away with murder. That, and have dozens of people confessing to the crime merely to see their names on national news.

I do find it interesting that on the official police-generated “Finding Mollie” website, they use the pronoun “he” when describing characteristics or changes in behavior patterns of individuals who would be likely to commit a violent crime that could be associated with Mollie Tibbitt’s disappearance.

And, there’s the possibility that Mollie Tibbitts is with someone she knows and now that person is afraid to come forward fearing prosecution. This case is a head-scratcher for people not in the immediate circle of people in the know. And it may be a real puzzle for police investigators. But my bet is that the police have a piece, or pieces, of evidence that could tie someone to the case—piece of evidence known only to them and they do not want to suspect(s) to know “they know.”

*Anyone with tips in relation to Mollie Tibbetts’ disappearance is urged to visit findingmollie.iowa.gov. A reward for information about the case leading to her safe return has nearly hit $400,000 ~ Fox News

Excerpts from this article are featured today in the Fox News article “Mollie Tibbetts’ father says Pence meeting was ‘touching’ as 200 new tips pour in.”

To read the entire article, please click here.

Writers sometimes fail to capture what really goes on beyond the yellow tape at crime scenes. The reasons vary for these unfortunate omissions of solid information, but one theme is common … the use TV or film as research tools. How awful, right?

The little things often go unsaid, even though those details are often quite important!


So what are authors missing when they use television as their sole source of cop-type information?

Well, here’s a six-pack of helpful hints for those characters whose duty is to investigate a crime scene.

1. Death Scene Documentation, Evidence Collection, and Chain of Custody of the Body

Before the medical examiner enters the scene, be sure to preserve any evidence that may be altered, contaminated, or destroyed. You certainly wouldn’t want the M.E.’s footsteps to wipe out the suspect’s shoe prints, alter blood stain evidence, or mar tire impressions. Document the M.E.’s time of arrival, who called him and when, and what time the body was removed from the scene. Also, make note of the seal number placed on the body bag, if a seal was used. If not, note that the M.E. did not seal the bag and have an officer escort the body to the morgue, if possible. This simple act keeps the chain of custody intact.

2. Water Scenes: What’s Important? – Always document the water type (pond, river, lake, creek, etc.). Record the water temperature and the depth of the water where the body was found, if possible. Make note of and photograph the surroundings. It’s possible that the victim had been swinging from the rope hanging from the limb in that large oak tree, slipped, and then fell onto that large rock jutting out of the water. Everything is a clue. Record the position of the body in the water. Was it face down, or face up? Totally underwater, or floating? That could help determine how long the body had been in the water. Follow the clues!

3. Shoes – Everyone entering a crime scene should wear shoe covers. If not, pay particular attention to their shoes. Yours included. Photograph the bottoms of everyone’s shoes so you’ll be able to recognize the tread patterns when comparing impression evidence back at the office or lab.

4. Photograph Impressed Evidence – Always take a picture of impressed evidence (tire tracks, footprints, etc.). If something were to go wrong while you’re processing evidence and you hadn’t photographed before you started … well, you’re, as they say … SOL.

5. Fingerprinting Wet Surfaces – Don’t let a little rain stop you from lifting fingerprints. There are a couple of ways to obtain a good set of prints from wet surfaces—Wet Print, a spray on mixture that develops black prints instantly, and SPR, another spray on product that requires a little mixing before applying.

6. Gloves – Use a different pair of gloves when handling each piece of evidence. This is an important step that prevents cross-contamination. You certainly don’t want to transfer someone’s DNA from room to room, especially if that makes an innocent person appear to have been somewhere he hasn’t! And, it is possible to leave your prints on a surface even while wearing thin, latex gloves. Cotton gloves eliminate this problem.

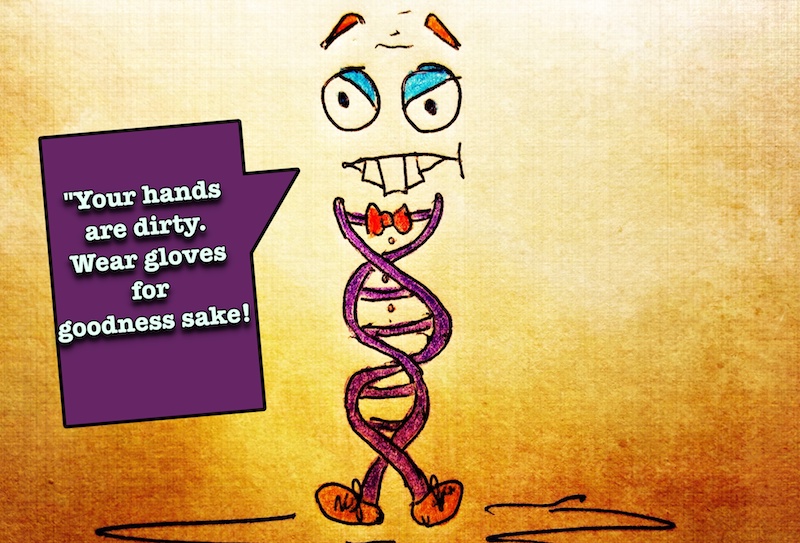
Angry DNA says, “Wearing gloves helps prevent contamination of evidence.”