
Academy Instructor Detective Sergeant Dilly Pickle: Homicide Crime Scenes
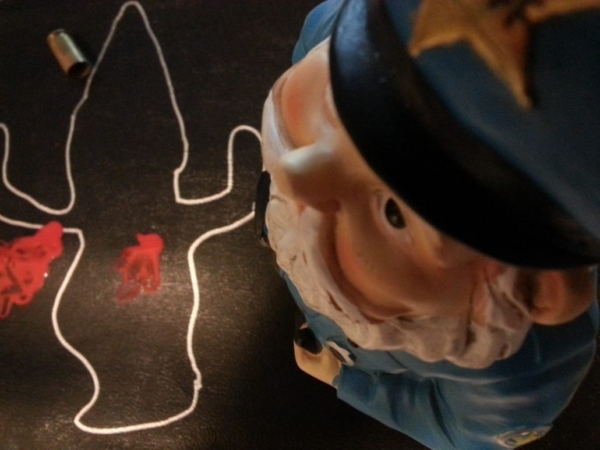
Good morning, cadets. My name is Detective Sergeant Dilly Pickle. I’m your instructor today and my topic is Introduction of Homicide Crime Scenes.
Before we begin I want you to totally scrub your minds clean of everything you’ve seen about crime scene investigation on television and film, and that you’ve read in many crime novels. Much of the stuff out there is a convoluted tangled mixture of information that’s bad, good, and downright fantasy, so it’s best we start fresh, with the basics.
Now, let’s see a show of hands. How many of you think you know where a homicide scene begins?
You there, in the back … Yes, you are 100% correct. A homicide crime scene begins at the point or place where the suspect’s thoughts of committing the murder transformed into action. And, the “crime scene “continues to any place where evidence of the crime could be found, such as the entire route taken by the suspect as he left the place where the crime occurred—through the back door, into and around a garden shed, across the neighbor’s lawn, down an alleyway, the sidewalk on Maple Avenue, the abandoned dirt lot the kids use for baseball games, and, well, you get the idea.
Any questions? No? Let’s continue.
The primary homicide crime scene, however, is always the location where a body is discovered. Sometimes victims are murdered in one location but their bodies are transported to other areas as a means to conceal the crime. In those instances the place where the body is found is the primary homicide crime scene. The site of the murder, when it becomes known, then becomes a secondary crime scene. All other locations where evidence could be/is discovered—footprints, a cigarette butt discarded by the killer in the backyard, the murder weapon in a dumpster three blocks away, are secondary crime scenes. Of course, many times the primary homicide crime scene and the location of the body are one and the same.
- A crime scene is any location where potential evidence may be located.
- Scene of the crime is the specific, physical location where a crime occurred.
There are nearly as many different ways to approach and investigate a crime scene as there are detectives in line at donut establishments. I suspect their orders—chocolate-covered, glazed, bear claw, etc.—are as diverse as their personalities and ways they approach the job. But, despite the menagerie of varying quirks and thought processes, there are things that should be done at all homicide crime scenes. For example …
Document the findings at the crime scene:
1. Document air temperature at the scene (ambient air).
2. Document body temperature—cold, warm, frozen, etc. This is “to the touch.” Cops do not insert thermometers into any portion of a human body.
- Algor mortis is simply the cooling down of the body after death. It’s the quest to reach room temperature.One method of determining the time of death is to take the rectal temperature of the deceased. Next, subtract that number from 98.6 (average, normal human body temp), and then divide the remaining number by 1.5 (the average cooling rate of a body per hour under average conditions). The result is the approximate number of hours that passed after the victim kicked the bucket.
3. Document livor mortis (lividity)—was livor mortis present, and at what stage? Was it fixed? Was body position consistent with the stage of livor mortis? Did someone move the body?
- Livor Mortis, or lividity, is the pooling of blood in the lowest portions of the body. Lividity is caused by gravity and begins immediately after death. The telltale signs of livor mortis, the purplish discoloration of the skin, begins the moment the heart stops pumping. This process continues for approximately 6-12 hours, depending upon surrounding conditions, until it becomes fixed, permanently staining the tissue in the lowest parts of the body. When large areas become engorged with lividity, the capillaries in those areas sometimes rupture causing what’s known as Tardieu spots. Tardieu spots present as round, brownish blacks spots.
4. Document rigor mortis—what stage of rigor? Was the rigor consistent with the crime scene? Did someone move the body?
- Rigor Mortis, the contracting and stiffening of the muscles after death, takes a couple of hours to begin and completes in approximately 8-12 hours. The process starts in the smaller muscles of the head and face and moves downward to the larger muscles. When rigor is complete, the process reverses itself starting with the lower large muscles and ending with the smaller face and head muscles. The entire process can last for approximately 48 hours. The body will quickly decompose after rigor is complete.
5. Document degree of decomposition—skeletonization, putrefaction, mummification, etc.
I know many of you have plans to travel to the beach this weekend, so before you go you should study the article below. And, yes, you”ll be tested on the information. So, please click the image to begin reading.
6. Document animal activity—was the body in any way altered by animals?
7. Photograph the body exactly as it was found. And, the ground beneath the body should be photographed once the body has been removed.
8. Document victim’s physical characteristics—description of the body, including scars, marks, tattoos, clothing, jewelry, and obvious wounds).
9. Make note of the type of on-scene emergency medical care, or the lack of treatment.
10. Document presence of body fluids and where they’re found (mouth, nose, beneath the body, etc.). Also note if there’s no indication of body fluids.
11. Bag the victim’s hands (and bare feet) in clean, unused paper bags.
12. Collect, or arrange for the collection of trace and other evidence.
13. Determine the need for alternate light sources and other specialized equipment.
 14. Photograph the victim’s face for future identification purposes (remember, most present-day identifications are done via photograph or video).
15. Make note of the presence of insects. Photograph and collect samples of each.
16. Protect the body from further injury and/or contamination.
17. Supervise the placement of the body into a body bag, and install the proper seal/securing.
18. Ensure the proper removal and transportation of the body.
19. Who, What, Where, How, and When. Who discovered the body? Who was present when the body was discovered? Where was the body discovered? How was the victim killed? When was the body discovered? Who witnessed the murder? Etc. Document all, no matter how insignificant it sounds at the time.
20. Document EMS records/activity. Obtain a copy of the EMS call sheet/report, if possible.
21. Document witness statements—what they observed, the victim’s actions prior to death, killer’s description, etc.
22. Note medical examiner’s comments.
23. Obtain witness statements and contact information.
24. Document the names and contact information of everyone present at the scene (officers, EMS, medical examiner, witnesses, etc.).
25. Be certain that all evidence has been recovered before releasing the scene.
Well, that’s it for today’s class. You have twenty minutes to change into your PT attire and assemble on the lawn outside the dorms. We have a nice five-mile run lined up for your enjoyment, followed by an hour of stimulating exercise.
See you tomorrow.


When you line it all up like this, it’s SO helpful.